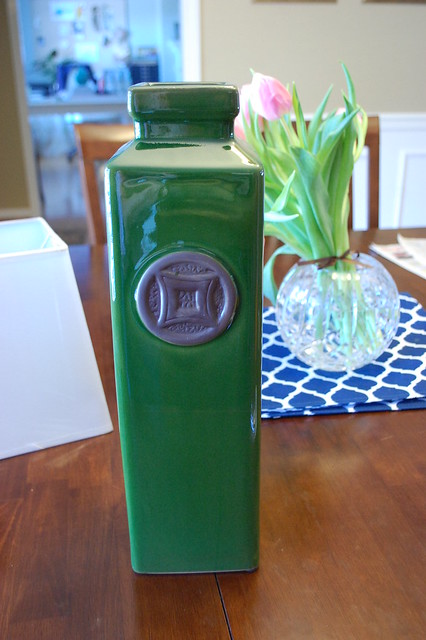
remember these?
well the second i saw them i was immediately reminded of these lamps i have been coveting for my dining room:
love.
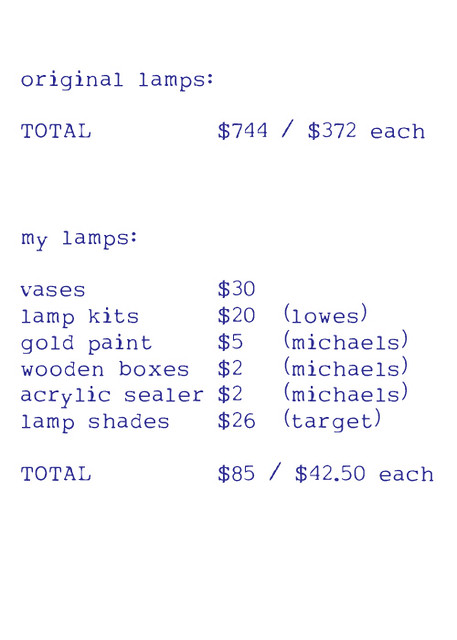
and will only set you back $372
a piece... HA
so, i got that crazy itch and decided that, for $14.99 each, it was worth the $30 mistake if my idea didnt pan out with those green vases. {at least thats what i told stephen when i came home with more "stuff" as he would call it ;) and now a quick shout out to my wondeful husband who went against his better judgement and completely supported me in this project...i guess he realized it was this or being out of pocket $750 :) haha...yeah right}
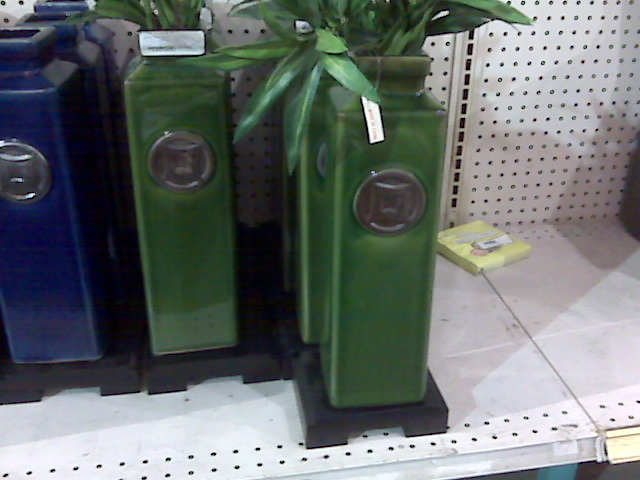
a few trips to lowes and michaels later, and the vases
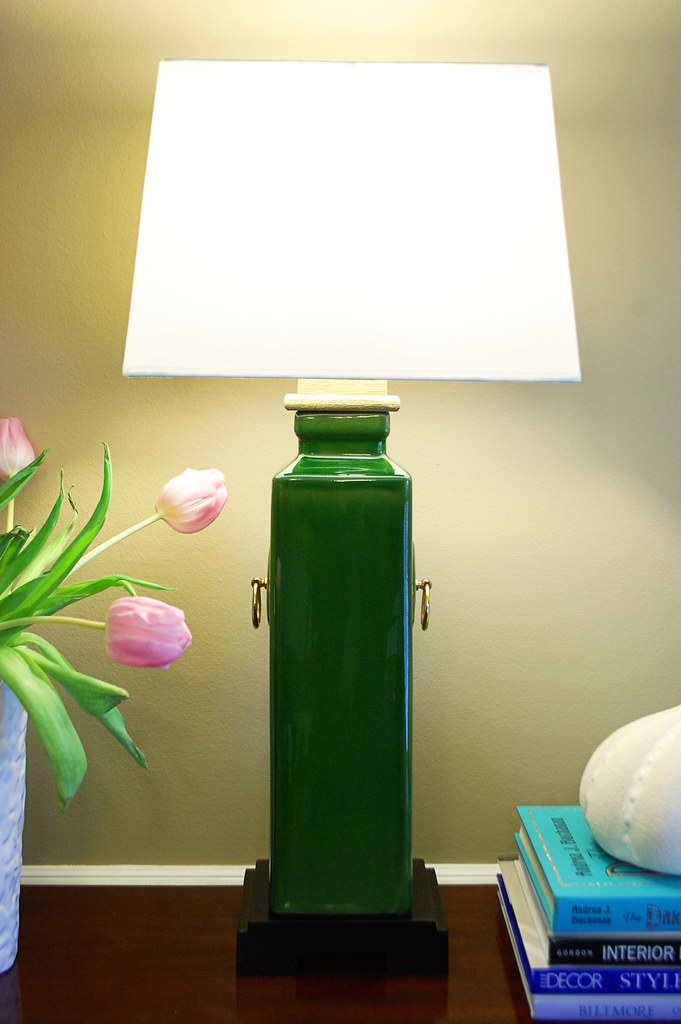
are now my new dining room lamps!
it was a quick weekend project, and im proud of myself for actually
finishing it. i tend to have several ongoing projects stuffed around the house that always take me forever to actually finish {hello bennett and emory's bedrooms....}. the hardest part was figuring out how to marry the top of the vase and the lamp socket thing. a couple trips to michaels and i was happy with what i found:
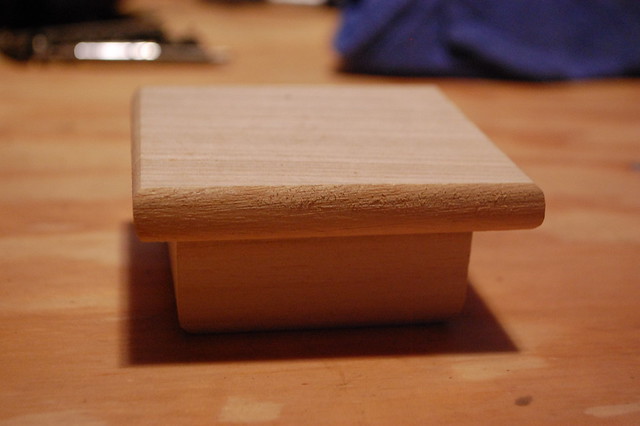
these little boxes were $1 each and i just turned them upside down, as the box's top was just bigger than the opening of the vase.
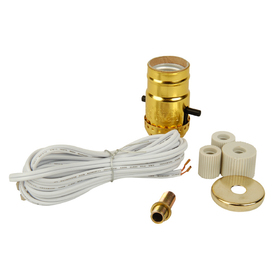
lowes and home depot {as well as many other stores im sure} sell lamp kits that help you take an ordinary bottle and turn it into a lamp.
if you are interested, here are the steps i took turning my vases into lamps:
before you do anything, remove pricetags and growl at the stupid sticky stuff left on the tops
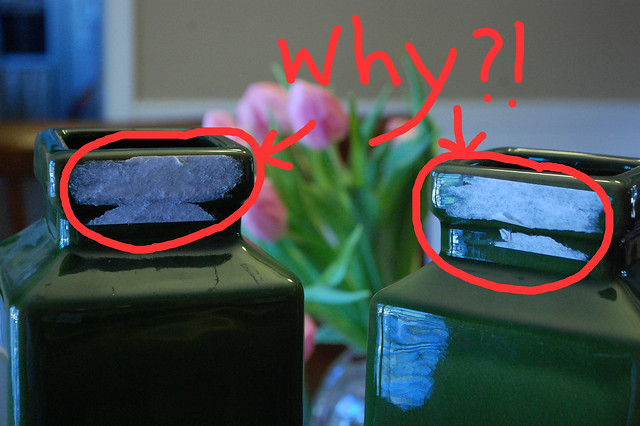
remove with fingernail polish remover and paper towels
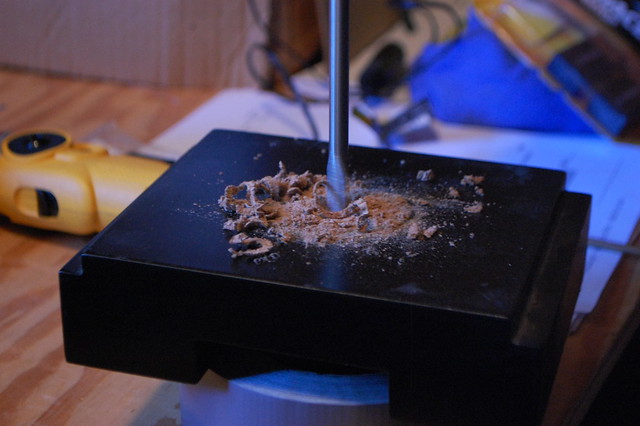
1. drill hole large enough to fit wire through in bottom of vase {we used a mortar bit on stephens drill}.

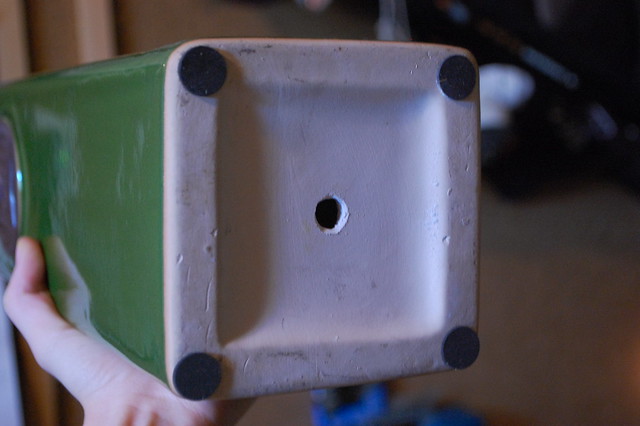
we also had to drill through the vase base {which was wood so used different bit}
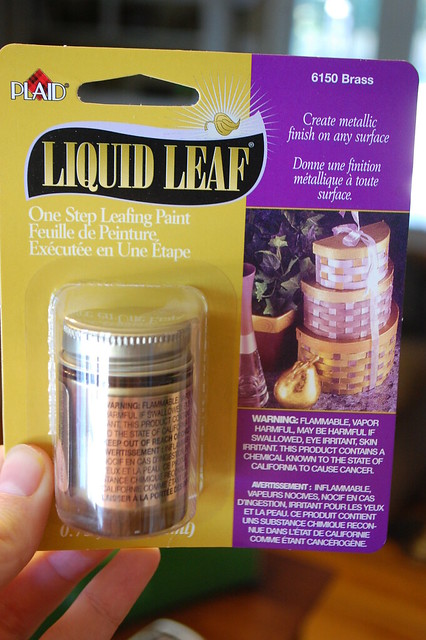
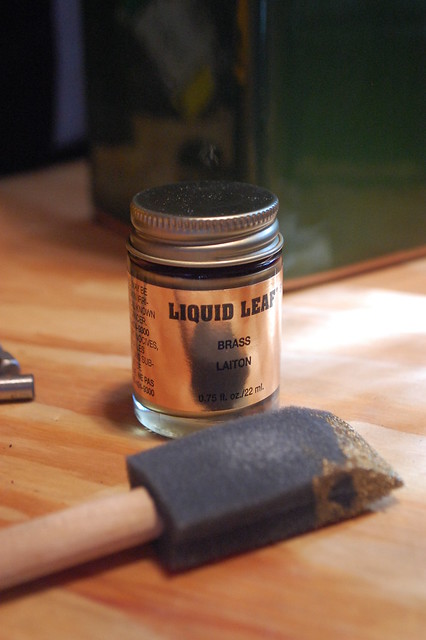
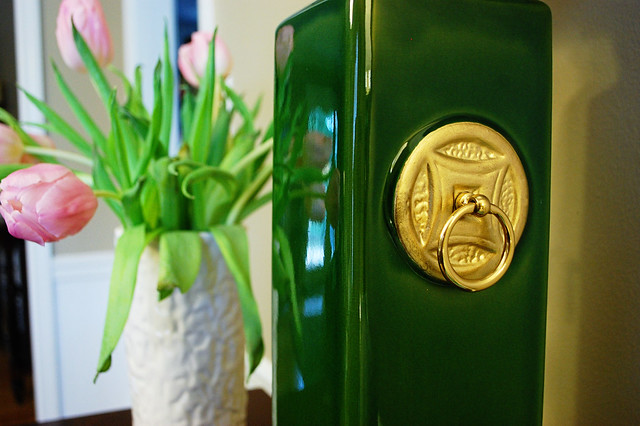
2. paint medallions on sides of vases using a small sponge brush {the kind you find in craft and paint stores}. i used a gold leaf-type paint from michaels to paint the medallions on the vases: {i bought brass since i was using brass rings}
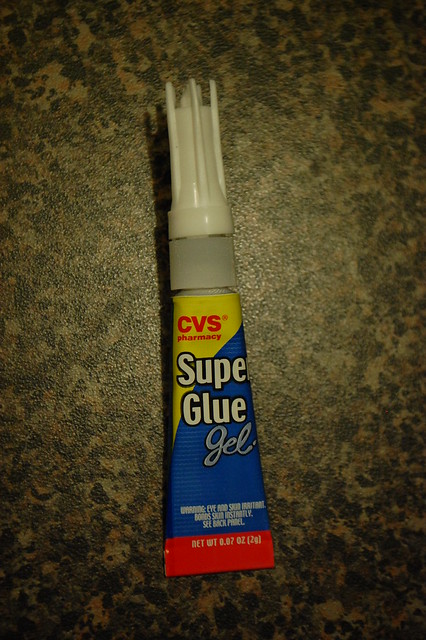
3. superglue brass rings to medallions. i bought this to use

but it didnt work
at all, even after drying overnight. simple superglue worked beautifully and dried quickly
i bought the brass hardware pulls from
this site, and just used the ring part, not the screw.

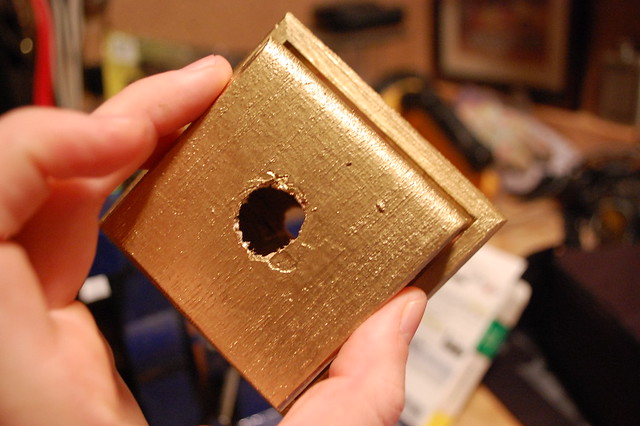
4. from this point on i didnt even try all the other fancy types of glue, i just stuck with what worked and superglued the top of the wooden box to the box itself. i then sealed the wood box with an acrylic sealer
it dries clear and helps prevent the wood from soaking up all the gold paint
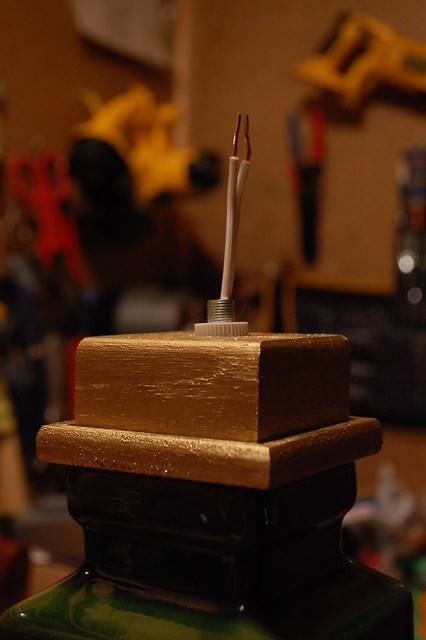
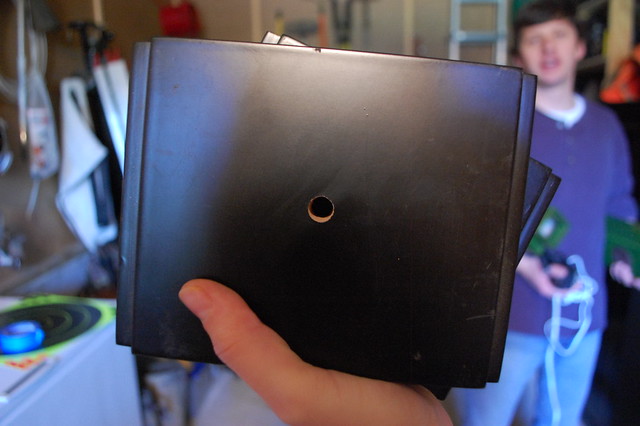
5. drill hole through box and top after it dries.
we drilled a larger hole in the part where we were inserting the lamp kit, large enough to accommodate one of the bottle adapters that came in the lamp kit.
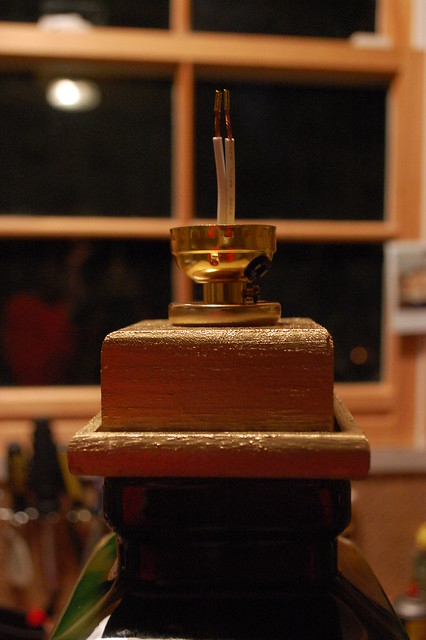
6. paint box with gold paint and let dry
yes i know that hole looks like a rabid raccoon ATE that hole out, but i knew i had the brass ring to cover it that came in the lamp kit :)
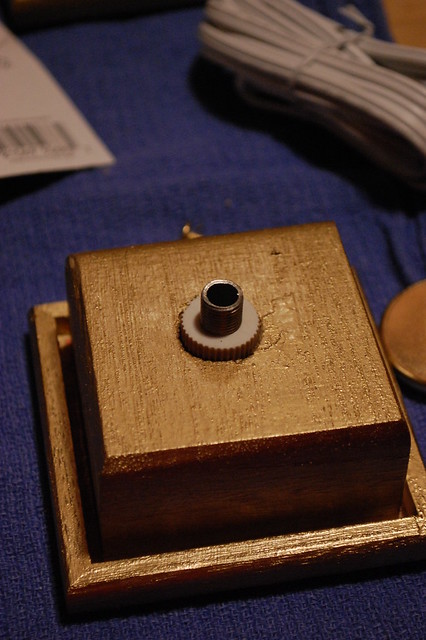
7. superglue vase to base
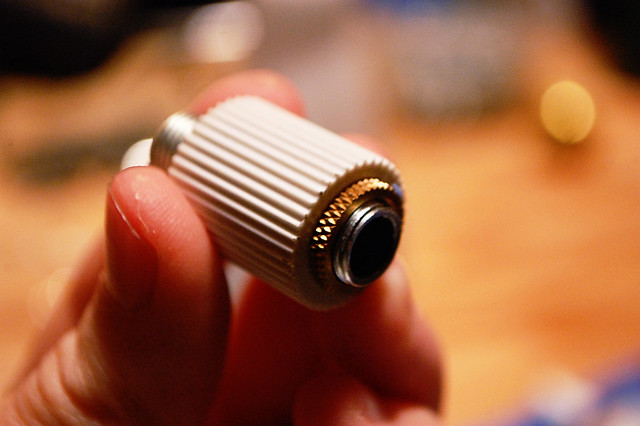
8. assemble lamp kit {which took some time since the directions are over-simplified and a little hard to follow. tip: TAKE YOUR TIME...you dont want to mess this up bc once you snap the light together, theres no re-working}
9. insert bottle adapter piece into big hole in wooden box and pull wire through base, vase, wooden box, and adapter.
make sure you insert this end into the box/vase
10. superglue box to top of vase
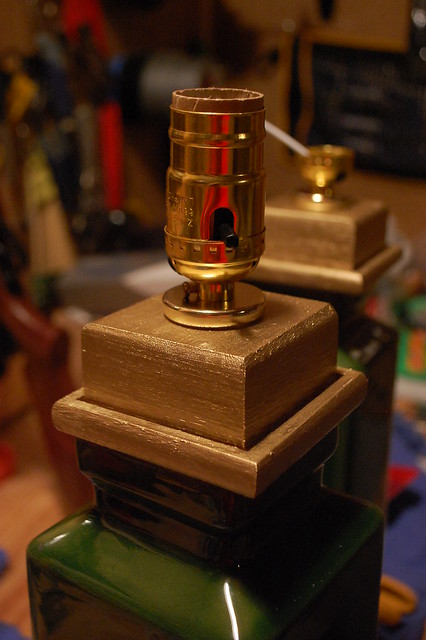
11. attach wire to screws per directions and fasten top of socket
12. place shade and screw in light bulb and voila! ...um, i said VOILA!
13. almost break down in tears bc the lamp does not turn on.
14. try to pry open light but realize it is snapped shut and there is no turning back {as mentioned in step 8}
15. go inside and google "portfolio lamp kit" to see if there are any more in depth instructions and/or troubleshooting tips
16. theres not so ask husband to come outside with you to check it out, hold back tears
17. talk him through what is wrong and screw bulb in a little tighter and then.....yes realize you are a dummy and didnt screw the light bulb in tight enough... {how many blondes does it take...}
18. voila for real!
its so fun when your vision is materialized, and i am so excited about my new lamps!
here is a breakdown of the costs:
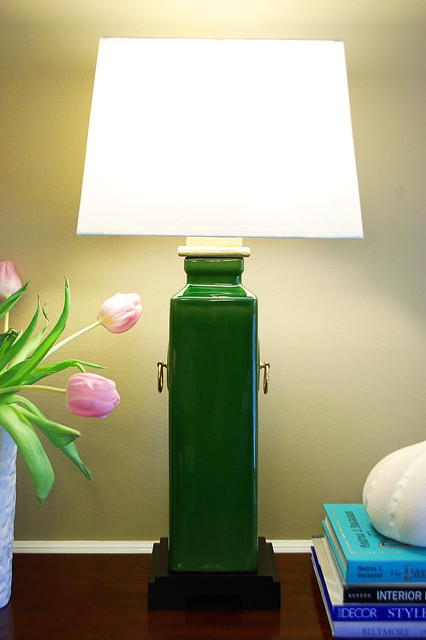
i went back and forth on the lamp shade...whether to do a drum shade like the original or not...but decided i wanted a rectangular shade so the lamps wouldnt have to sit too far away from the wall. i looked at all my normal sources and everywhere else i could find online but ended up finding two at my local super target for 12.99 each!
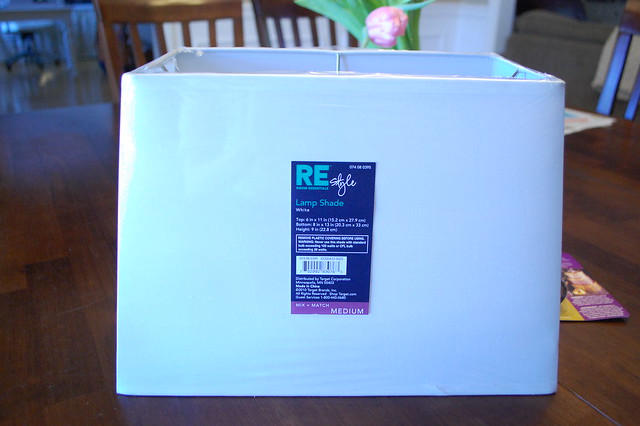
{which really helped with total cost, considering the other lamp shades i was looking at were around $30-$50 each}.
note: the lamp shade i bought is the kind that just slides on the socket thing before the light bulb goes in. however, most lamp shades im familiar with use a
lamp harp...i thought about this after i constructed my lamp but if i was to do it again i would have threaded the fixed part of the harp onto my lamp in case i ever wanted to change out the lamp shade. hindsight 20/20!
go make a lamp today! and save yourself from yourself {and your ridiculously expensive taste!}